
The capabilities of a 3D printer are remarkable, with new designs being crafted every day. The options are seemingly limitless, allowing for the creation of just about anything. But deciding what to print is only the beginning. Additionally, without taking proper precautions and following the right steps, your idea will remain just that: an idea.
If you’re a technology nerd with a passion for playing the guitar, we’ve found the perfect challenge for you: making a guitar with a 3D printer.
In 2019, Swedish manufacturer Sandvik made the first titanium guitar that they claimed was “smash-proof” and they used a 3D printer to make it. This remarkable feat inspired nerds all over the world to design and create their own 3D printed guitars.
Before you begin the printing process, you will need to decide on a design. Are you inspired by the smooth aesthetics of a Les Paul or would you prefer a design more suited to acoustic guitarists that reminds of a typical Martin guitar (Redditors’ #1 guitar)? With a little internet research, you can find a design that is not only attainable but matches the style you like. To give yourself the best chance of success when 3D printing a guitar for the first time, we recommend purchasing a design from an expert who is selling their designs online to 3D printing enthusiasts.
Depending on your level of experience with 3D printing, you should determine which parts of your guitar will be printed, and which parts will be purchased or used from a pre-existing model. You can use a 3D printed body and then attach a wooden neck to it. This not only makes the entire process easier, but it ensures your final product plays and sounds like an authentic acoustic guitar.
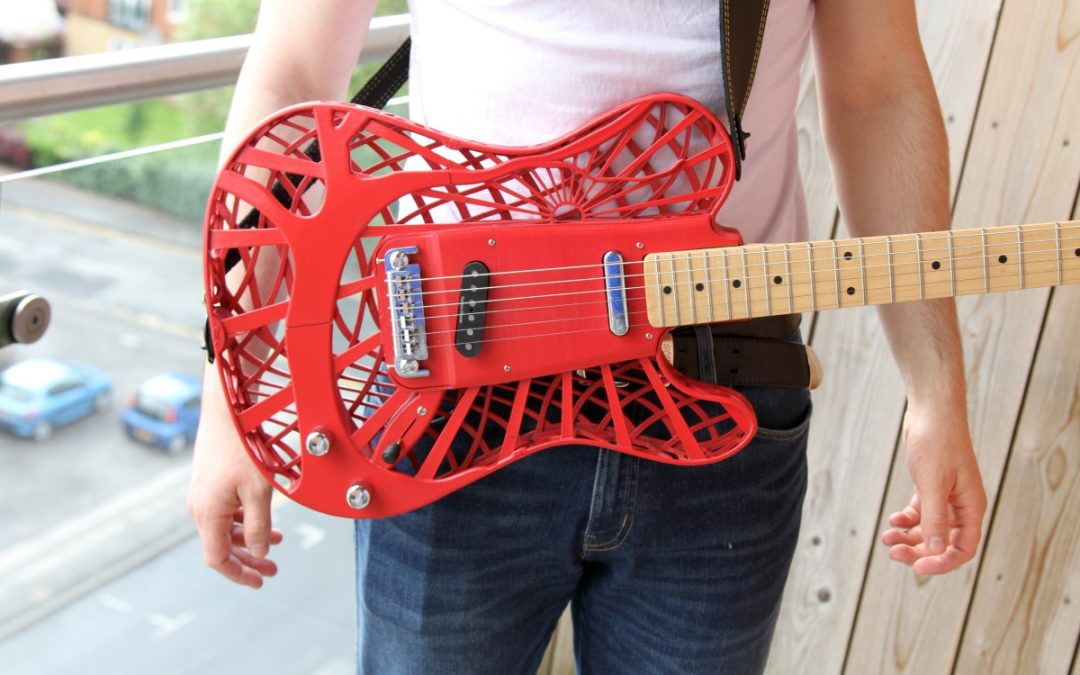
For 3D printing, the filament that is most commonly used is called Polylactic Acid or PLA. Some 3D printers can also use a special filament called Tough PLA. Tough PLA is just as easy to print as standard PLA, but it’s much stiffer and more impact resistant like another common filament, Acrylonitrile Butadiene Styrene (ABS). Unlike the myriad of colors available with PLA, Tough PLA is currently only available in white, black, red, and green.
Once you have your design and filament in hand, you will need to determine the most optimal way for your guitar to be printed. Depending on the size of your printer, you will need to print your guitar into a number of sections. When determining which sections to print at a time, consider which parts of the guitar will be under the most stress. These parts will want to be printed in a single piece so that the body as a whole can withstand the stress of string tension. Below are the steps you will need to take for this process, as done using the Sunhockey Prusa i3 3D printer. If you’re using a different 3D printer, the steps should still be similar.
- Click edit, then Plane Cut
- Adjust the arrows around the model to create two halves that will fit on your printer.
- Go to Cut Type and make sure you select Slice (Keep Both)
- Go back to Edit and select Separate Shells.
- Continue this process until all of the pieces are small enough to fit your printer.
Once all of the parts are printed, you will need to glue them together. We recommend using Loctite Epoxy. As you assemble the pieces, be sure to fill in any gaps to ensure the final product is as complete as possible.
With all your 3D printed parts glued together, it’s time to add the rest of your guitar parts. You may need to countersink certain parts to allow them to fit optimally. You should also check to make sure you have a place for all the wires to run. Once you’ve checked to make sure all your parts fit the way they should, you can finish gluing and attaching everything.
If you want, you can paint your guitar to customize it, or you can keep it the color of the filament to show off your 3D printing skills. That step is entirely up to you! However, if you do decide to paint your guitar, you should begin with a couple coats of primer, then add a few coats of the color, then finish it with a clear coat is a protectant. Once the paint and glue dry, you’re all set and ready to play your new 3D printed guitar.